
In this article we will be following up from our previous article Using Data Connectors with Microsoft Power Apps to learn about the Timer Control input component used in Microsoft Power Apps.
What is Timer Control in PowerApps?
Timer Control in PowerApps, is simply an Input Component amongst the Insert tools used for building apps.
It's also a control that can determine how your app responds after a certain amount of time.
Timers can, for example, determine how long a control appears or change other properties of a control after a certain amount of time has passed.
Key Properties for using the Timer Control Component in Power Apps
Duration – This is how long a timer runs in milliseconds. The maximum is 24 hours expressed in milliseconds. Default is 60 seconds.
OnTimerEnd – This is an actions to perform when a timer finishes running.
Repeat – The repeat function determines if a timer automatically restarts when it finishes couting, making use of the set time.
AutoPause – This function determines if the timer control automatically pauses, after a user navigates to a different screen.
AutoStart – The AutoStart function determines if the timer control automatically starts to play when the user navigates to the screen that contains that control.
OnSelect – OnSelect is used to set actions to perform when the user taps or clicks the Timer component.
OnTimerStart – OnTimerStart helps a user to set actions to perform when a timer starts to run.
Implementing Timer Control Component
Following up from a previous article, where we built an application using Power Apps, kindly go back to the article before you proceed; Using Data Connectors with Microsoft Power Apps. Also, you can check out this video, to understand better, before we proceed:
%[https://www.youtube.com/shorts/sitW9uOeTvg]
Now let us implement our Timer Control Component in our previously built Power App:
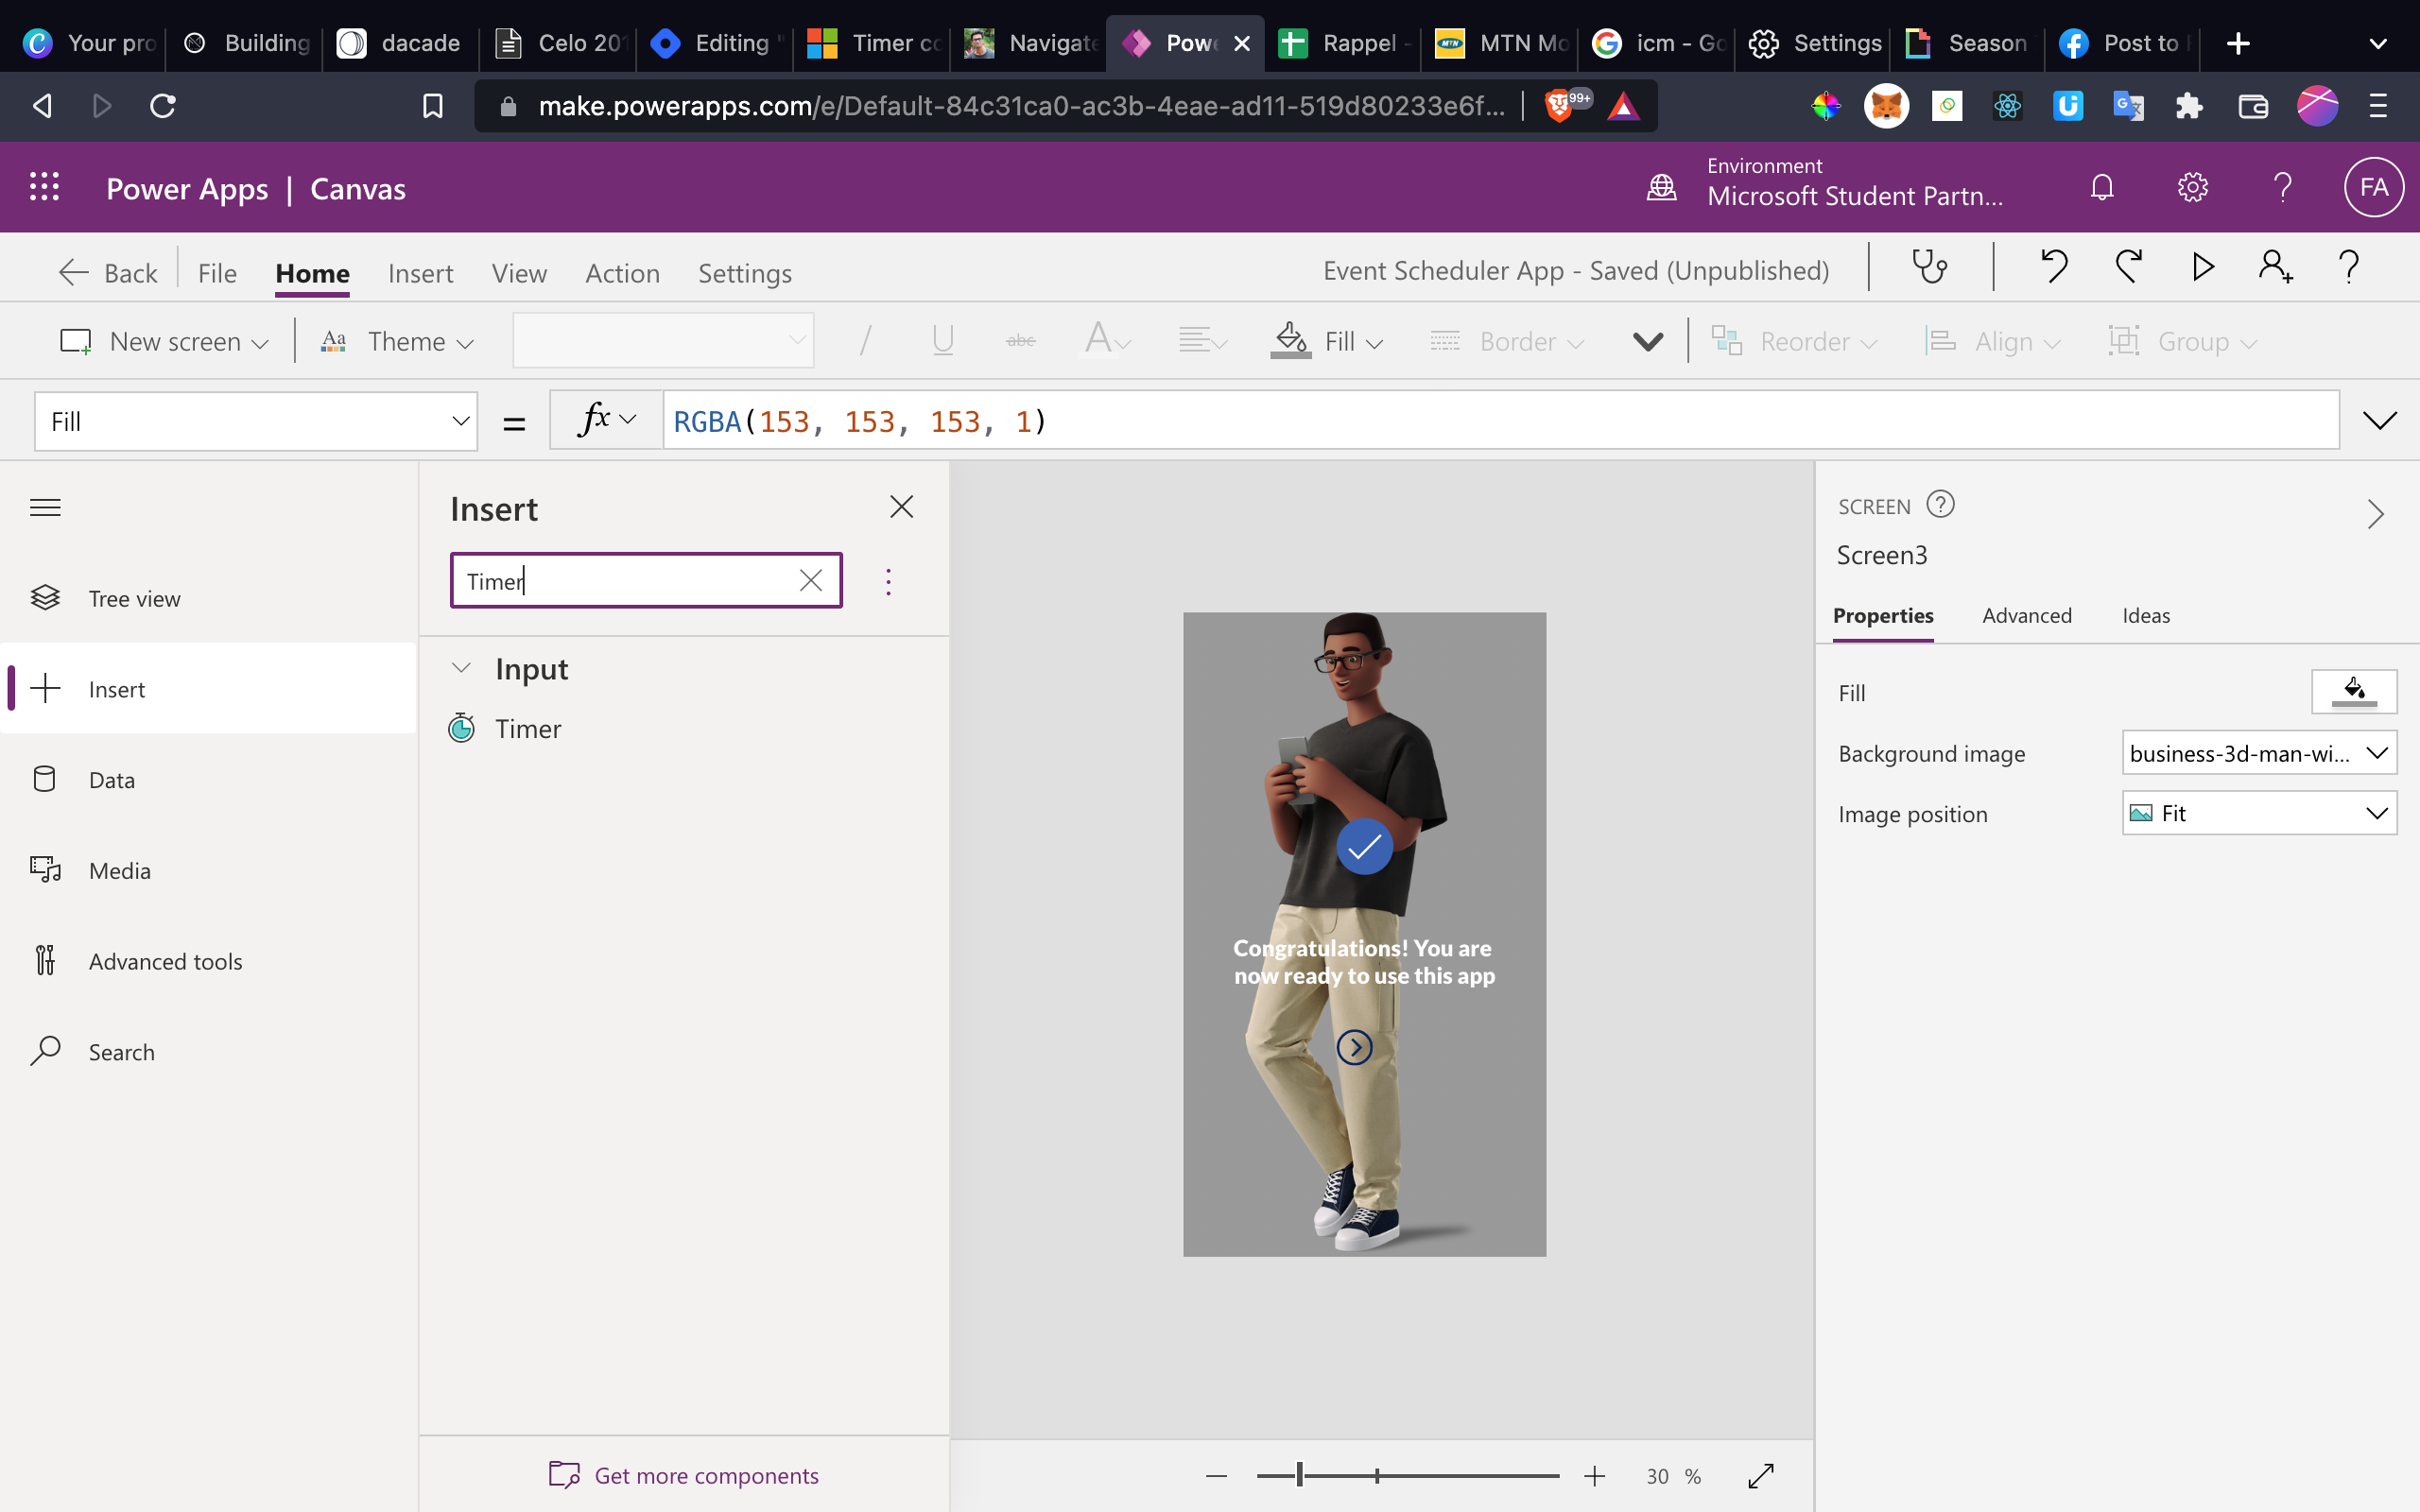
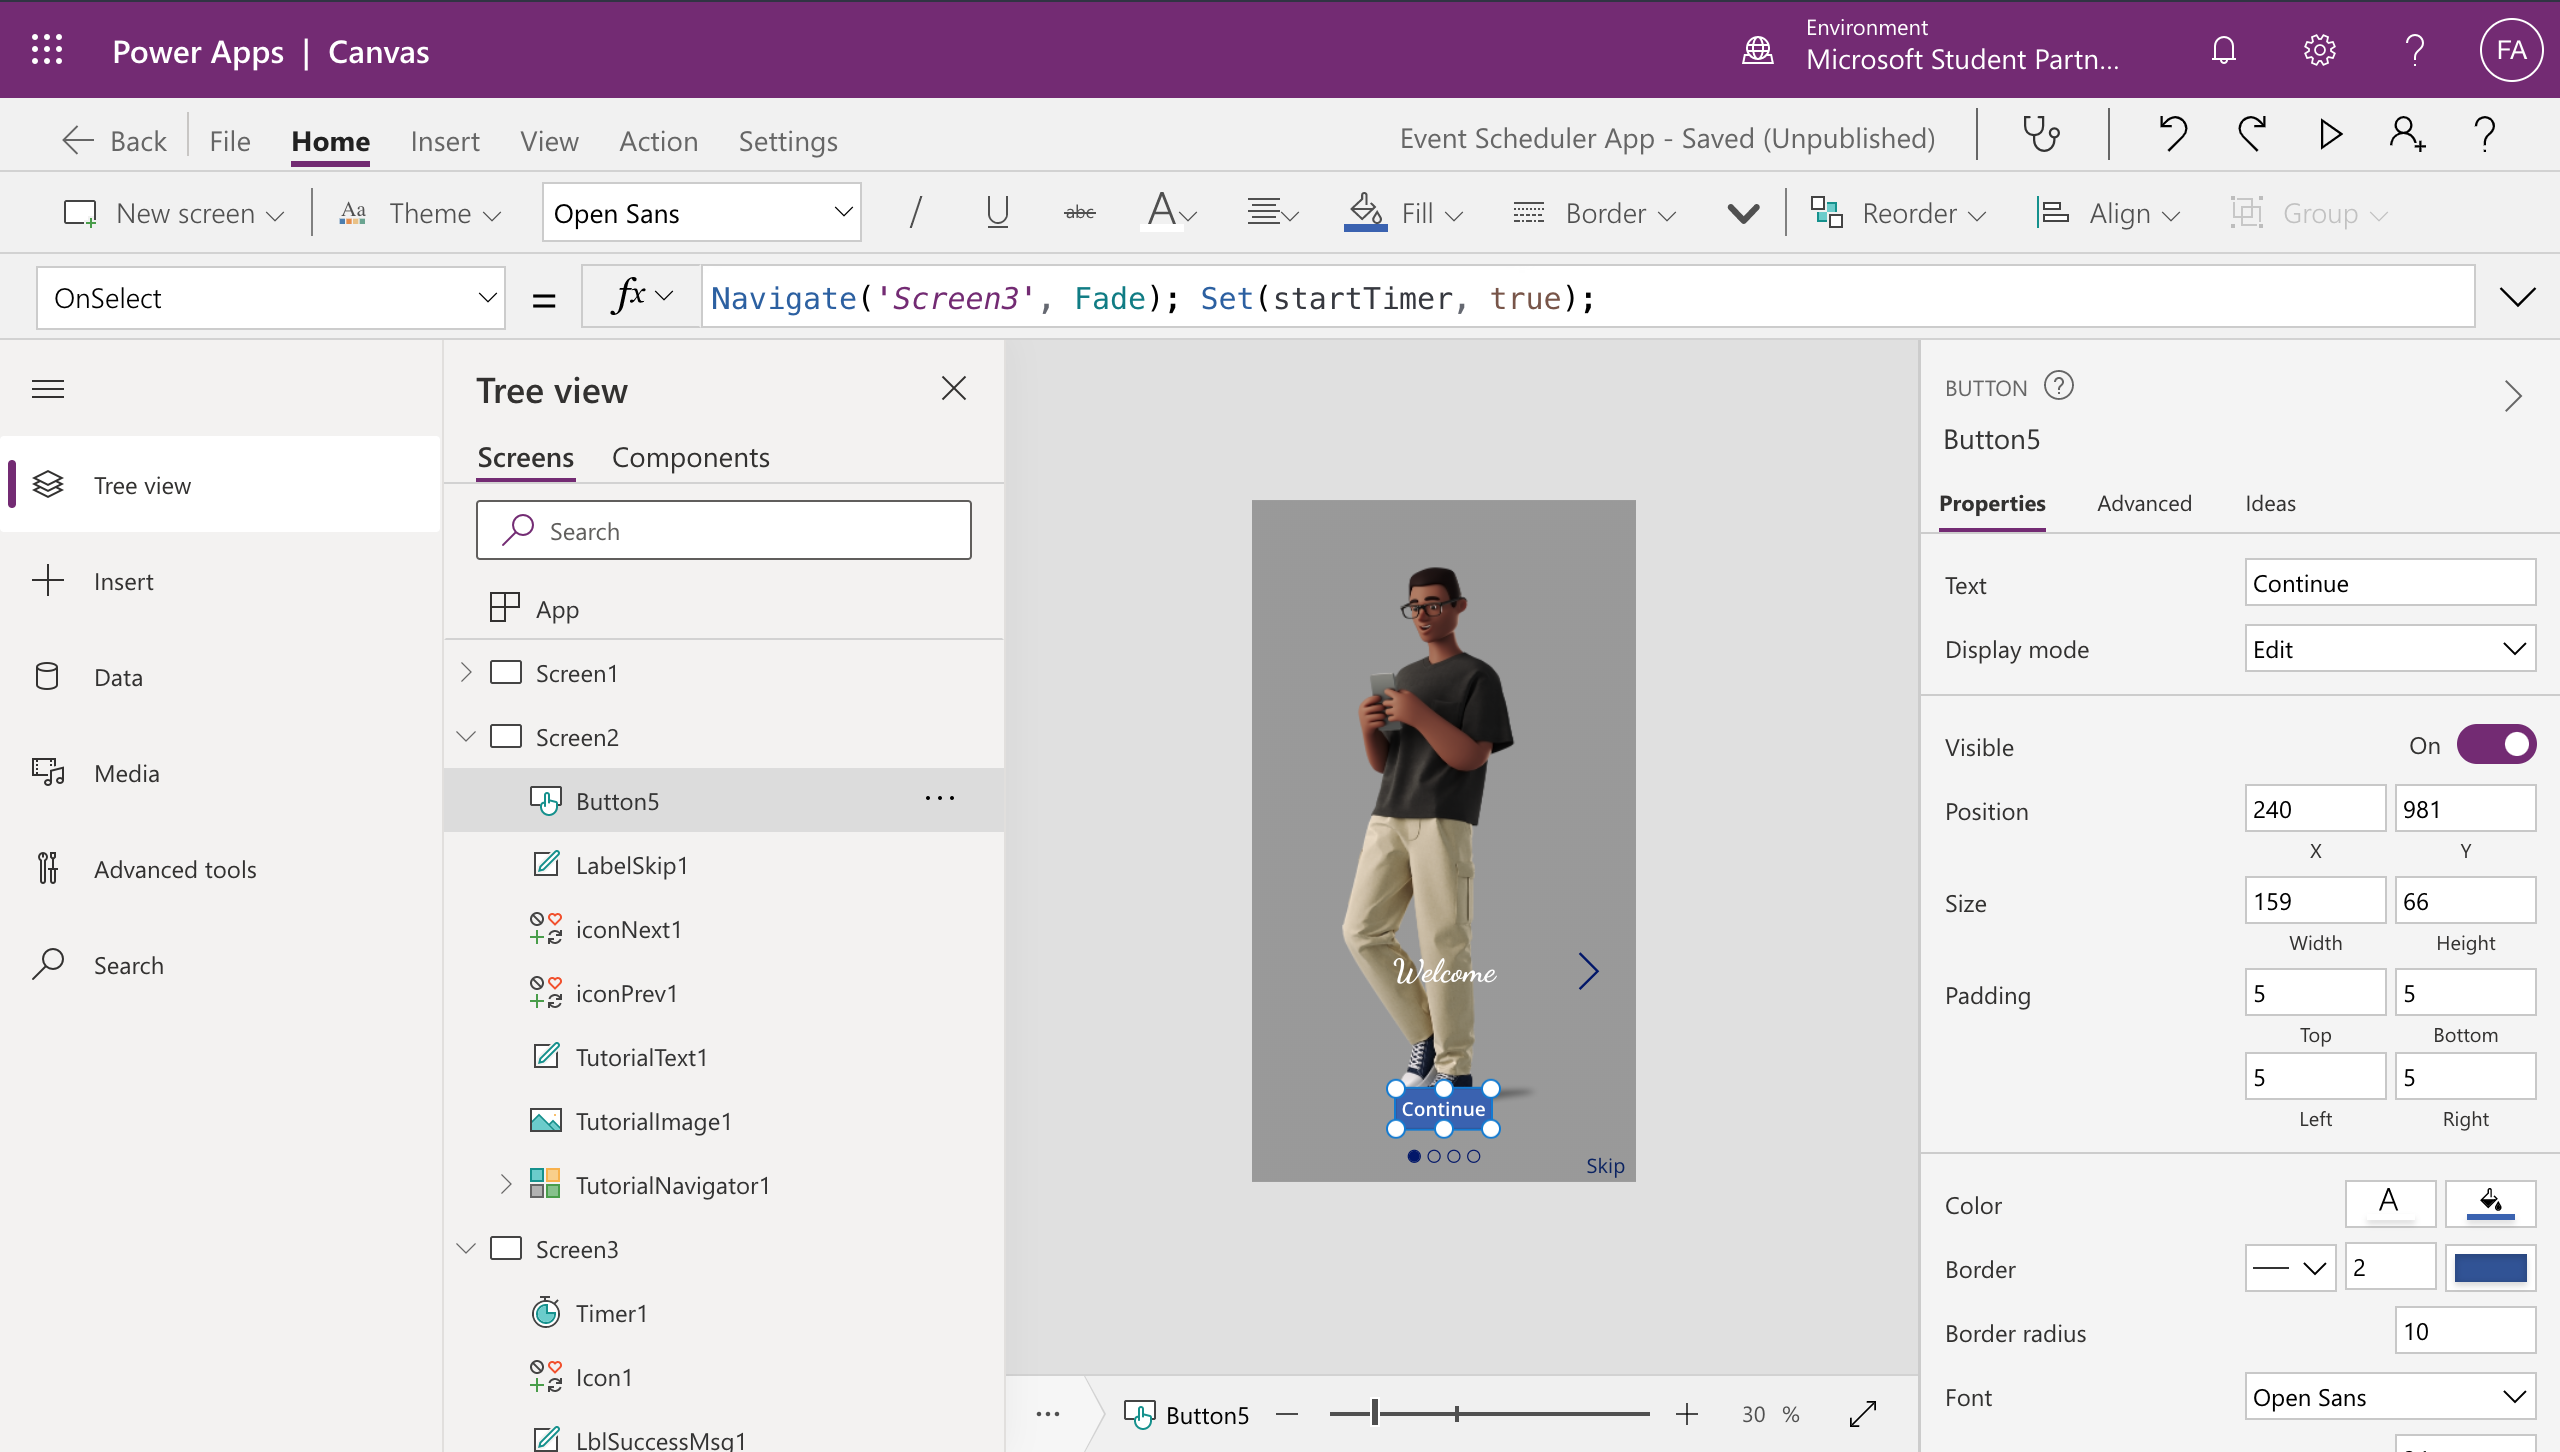
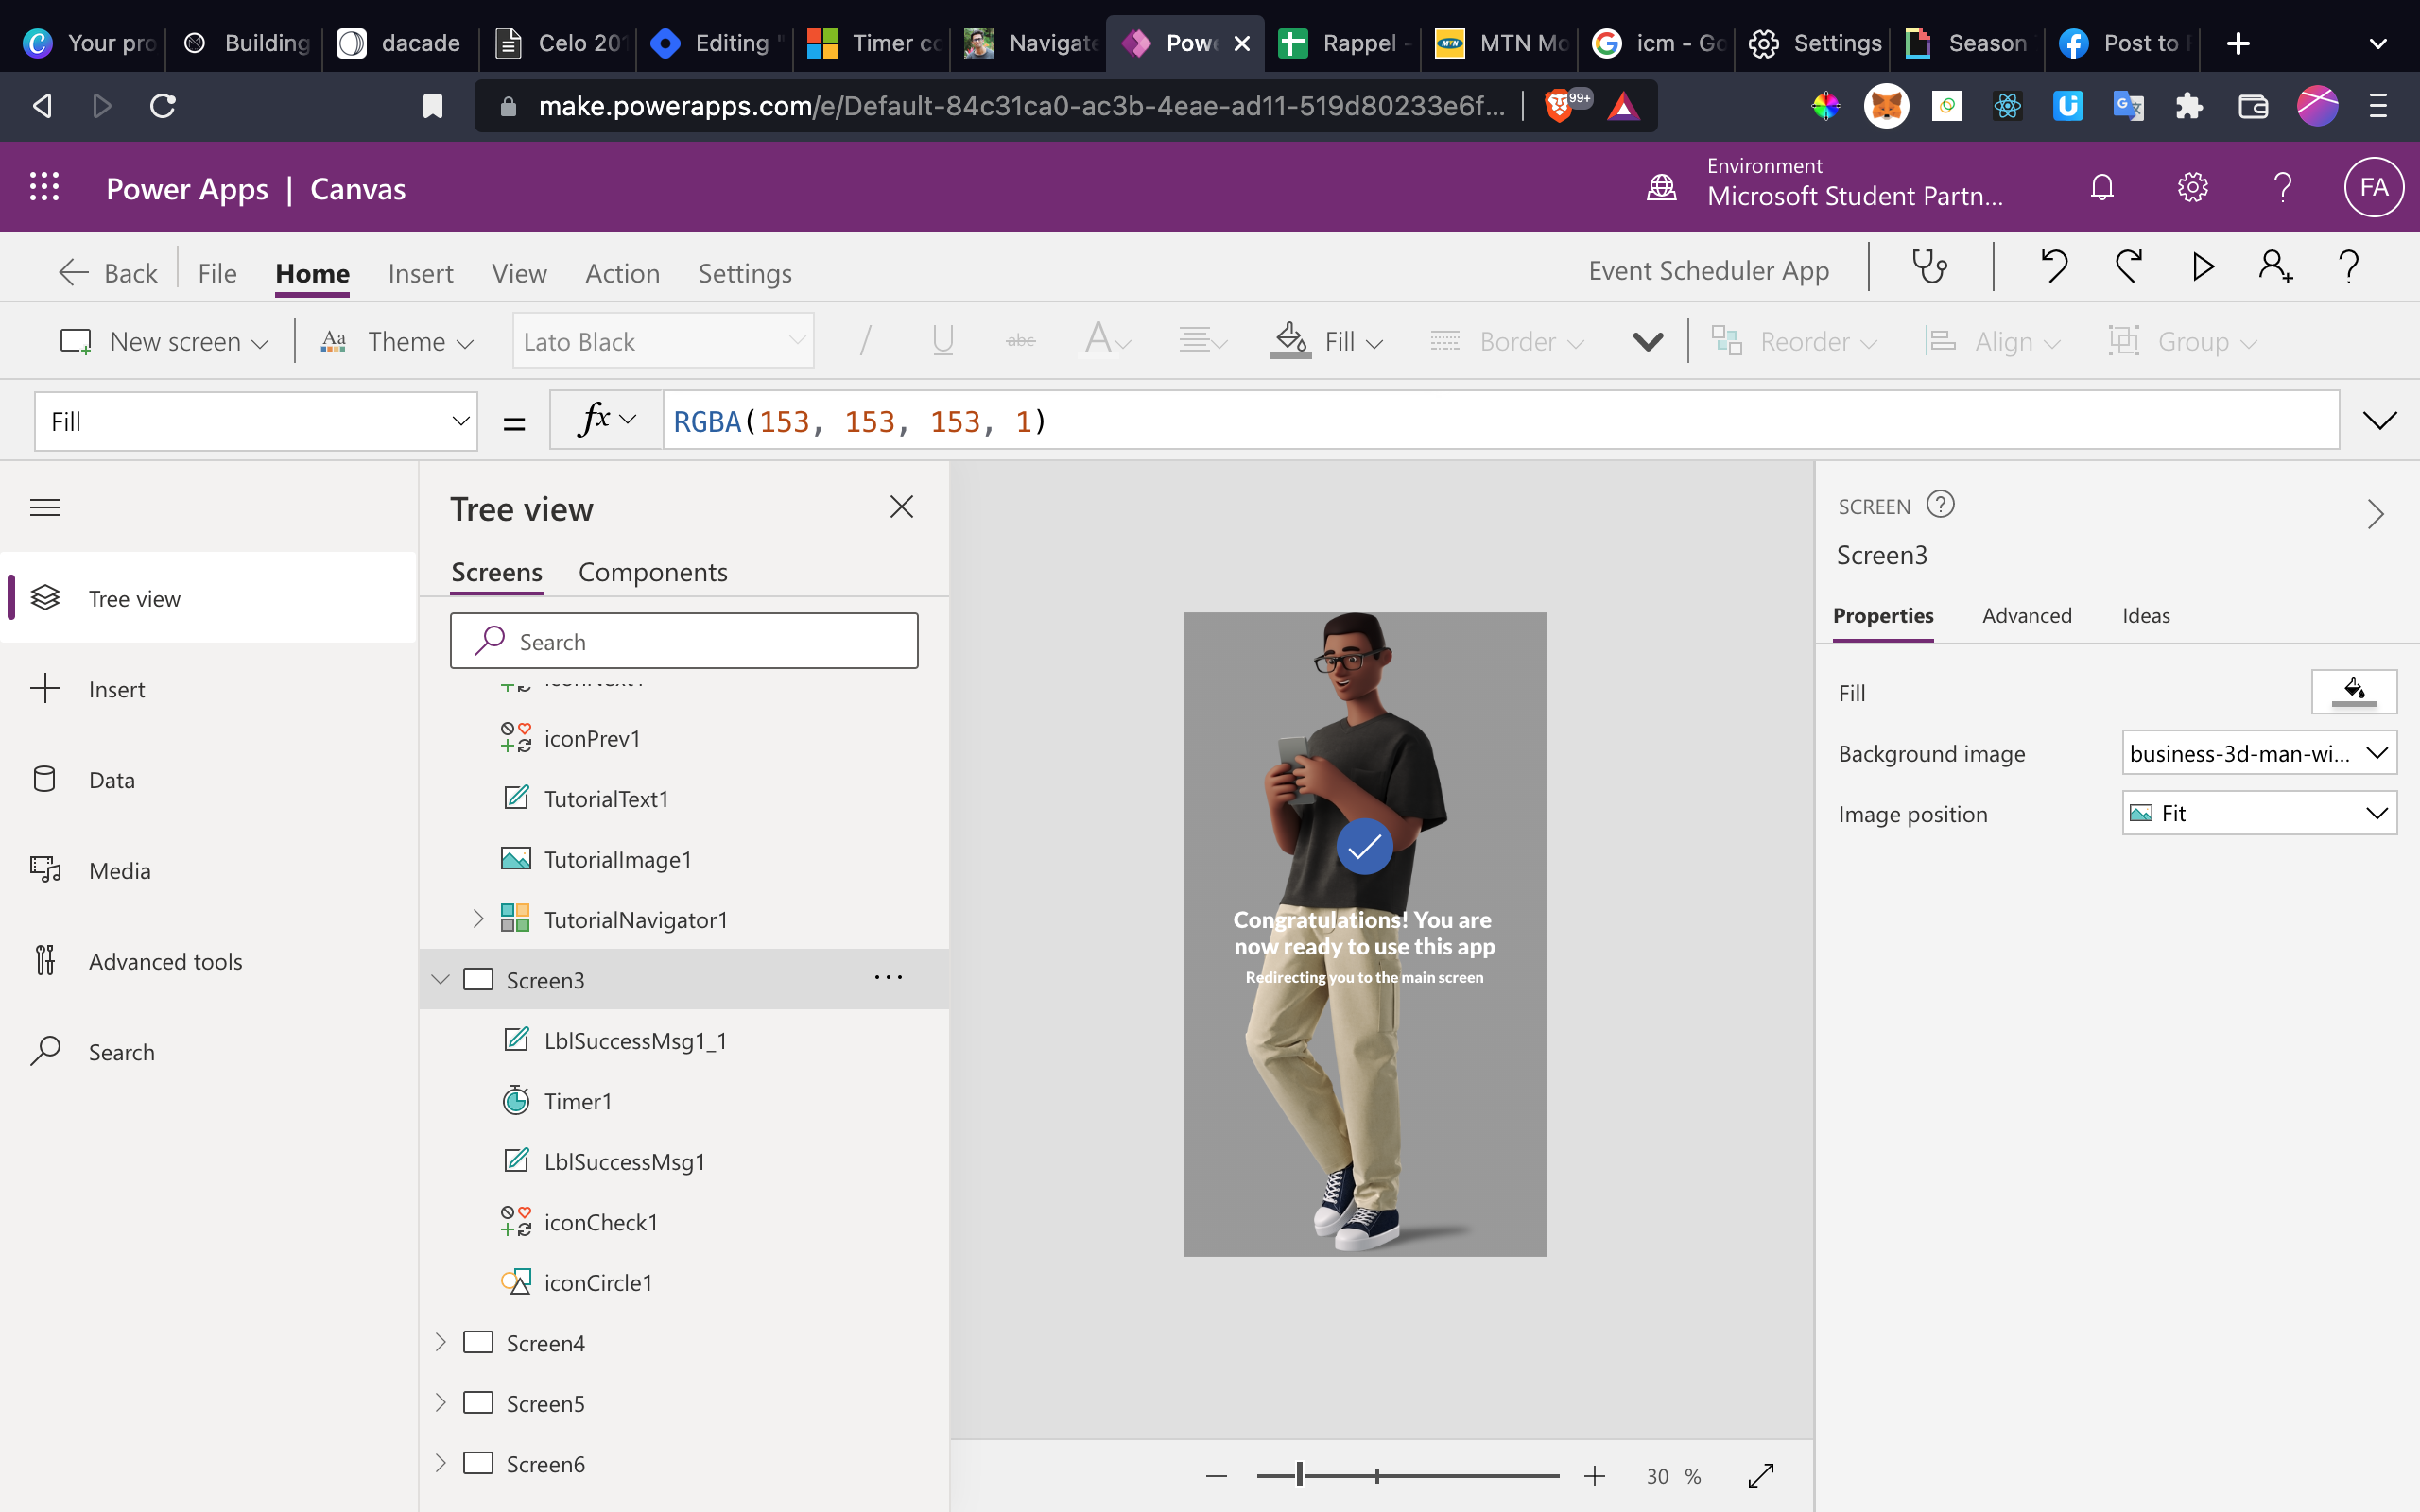
Go to Screen 3 (Our Success Screen)

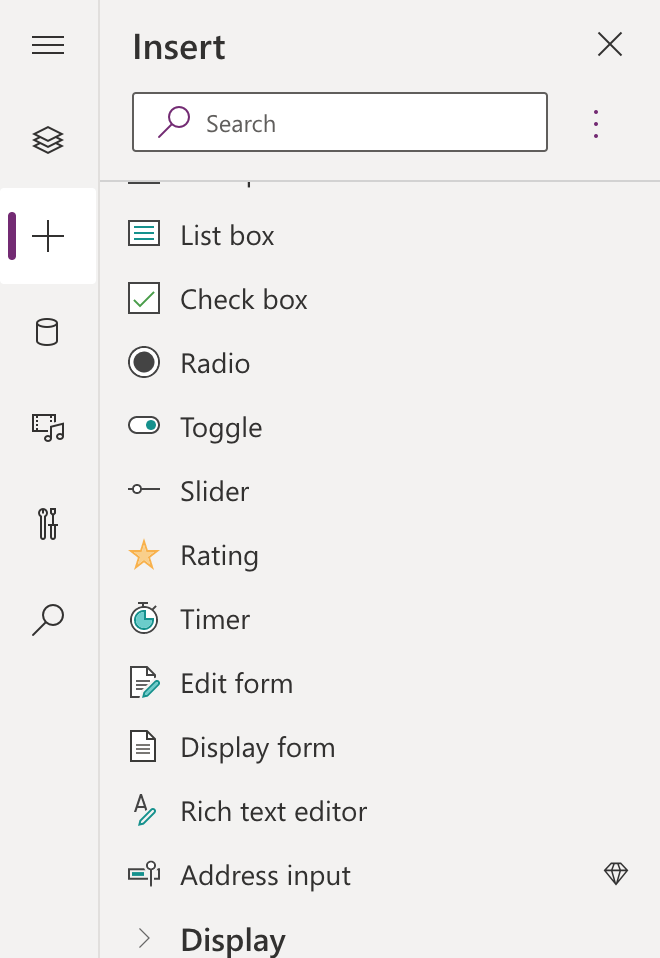
Click on the Insert Tool Item and Search for "Timer"
Add the Timer to Screen3 Components
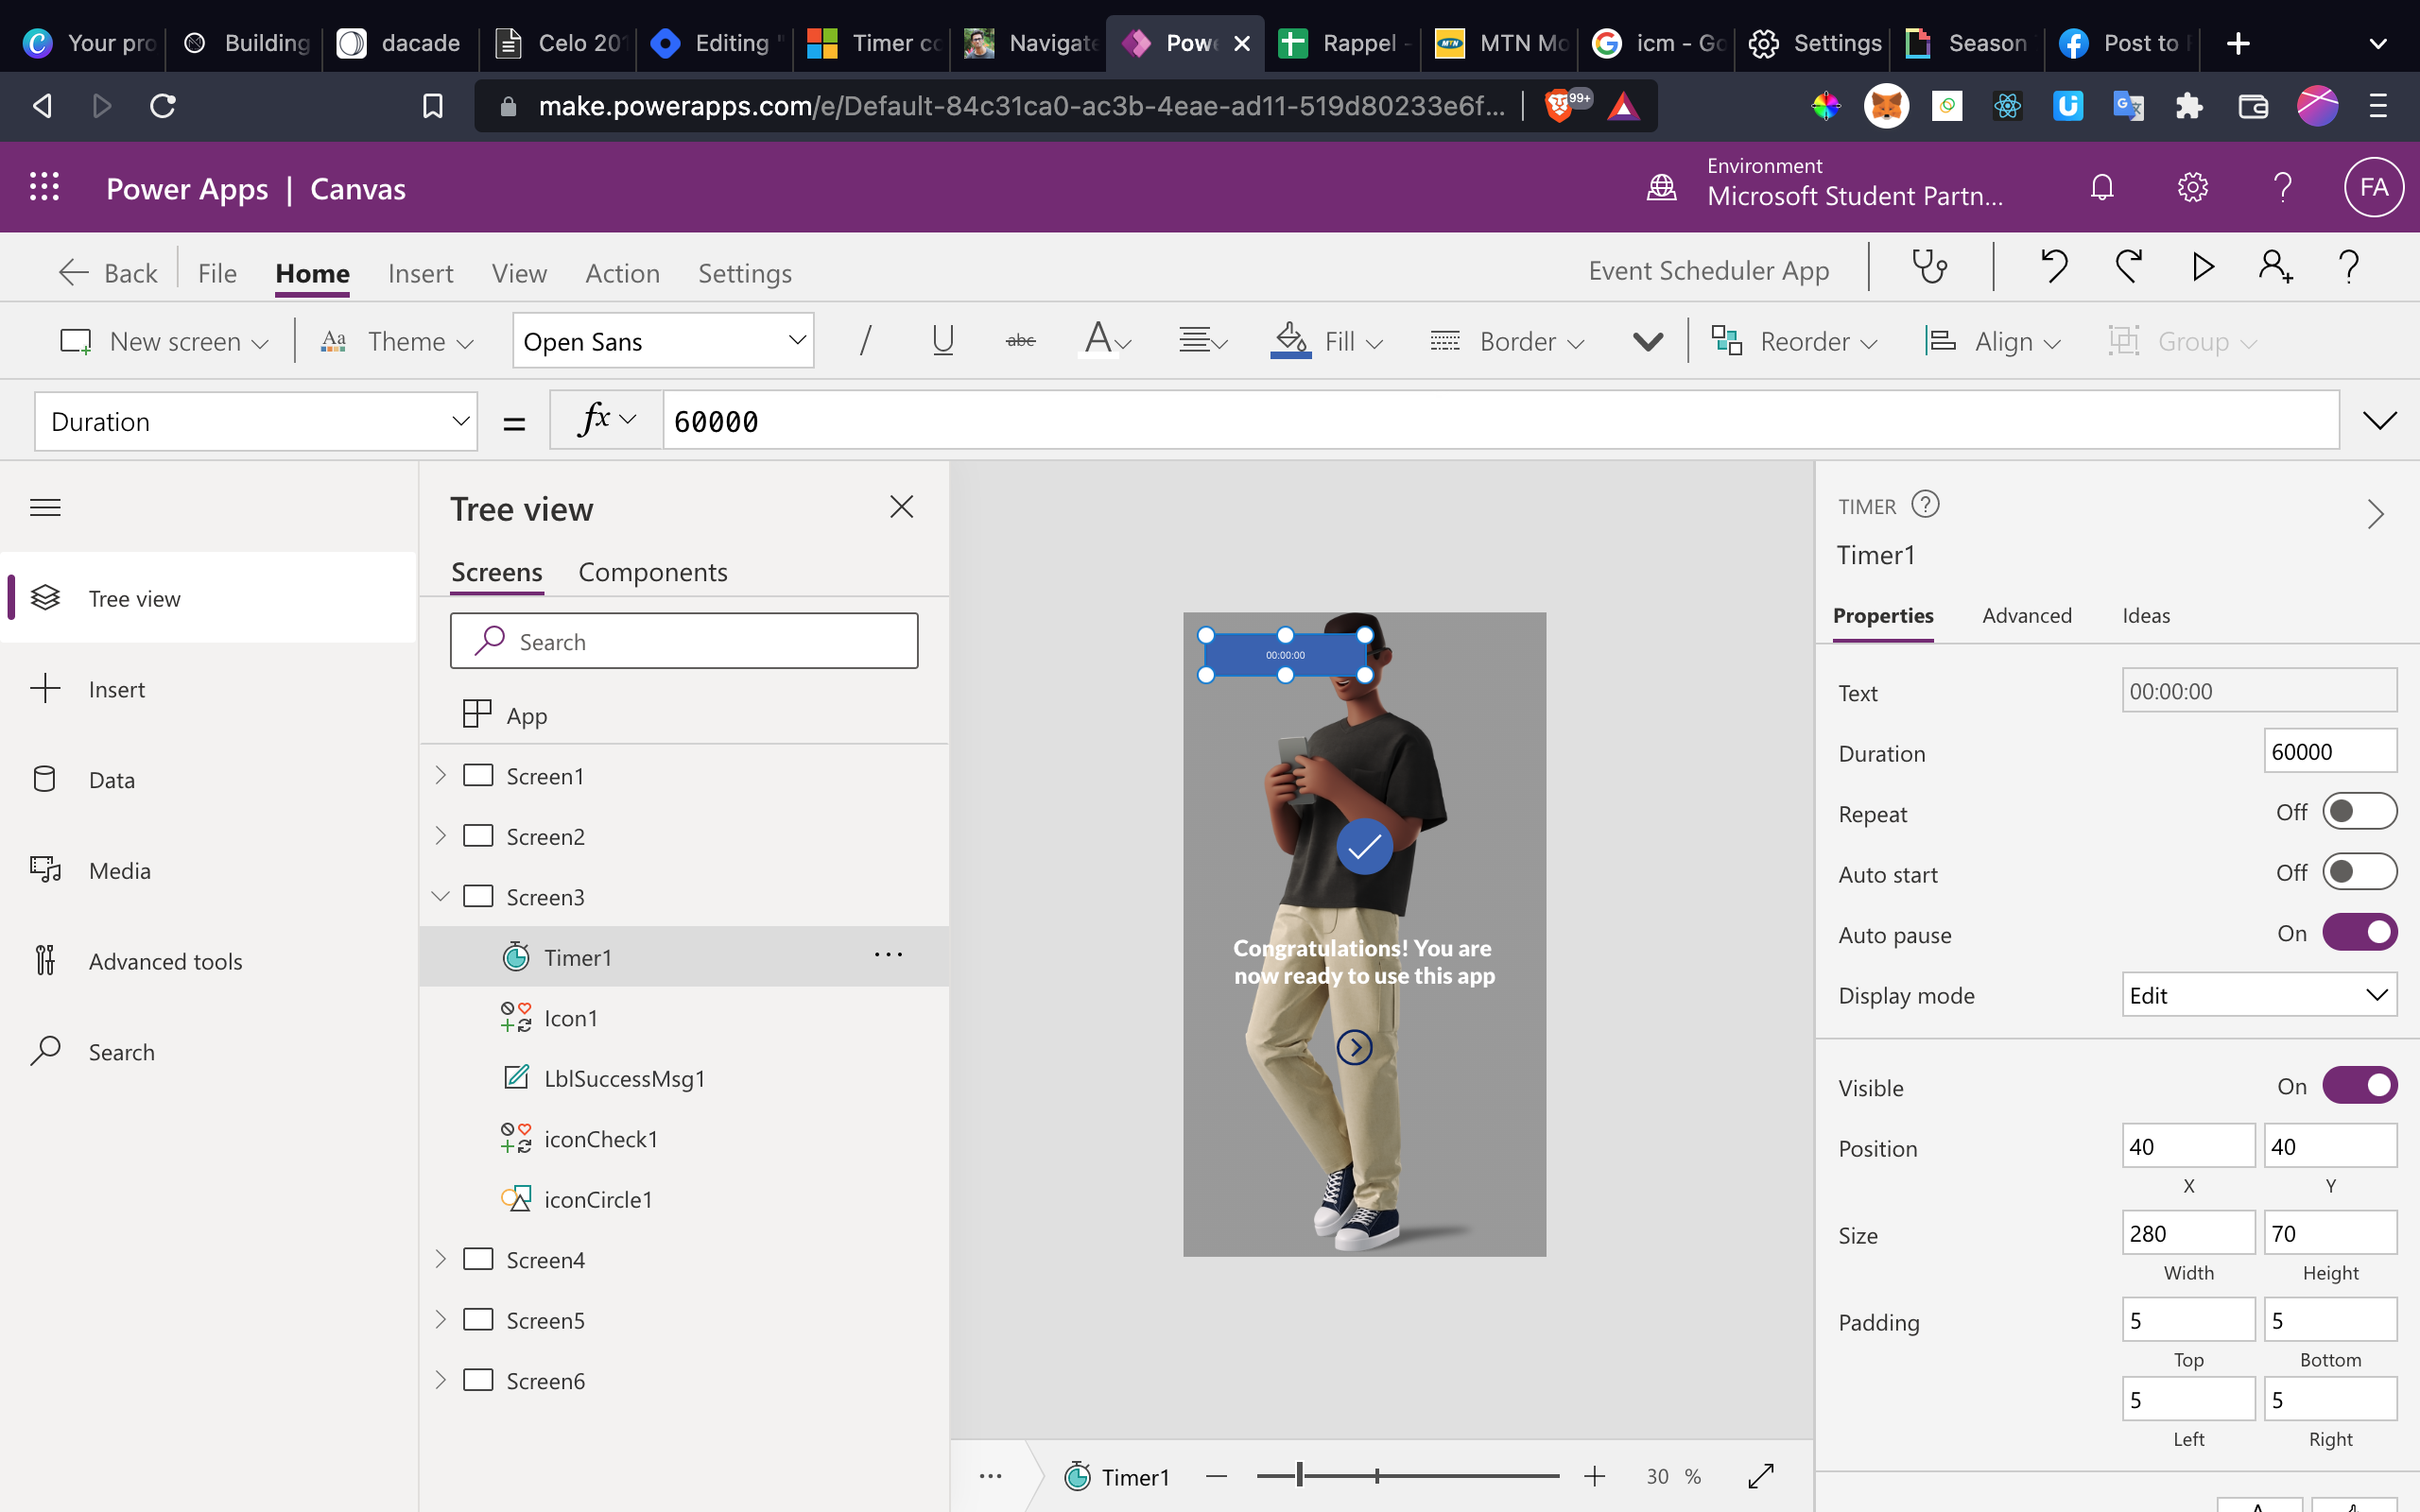
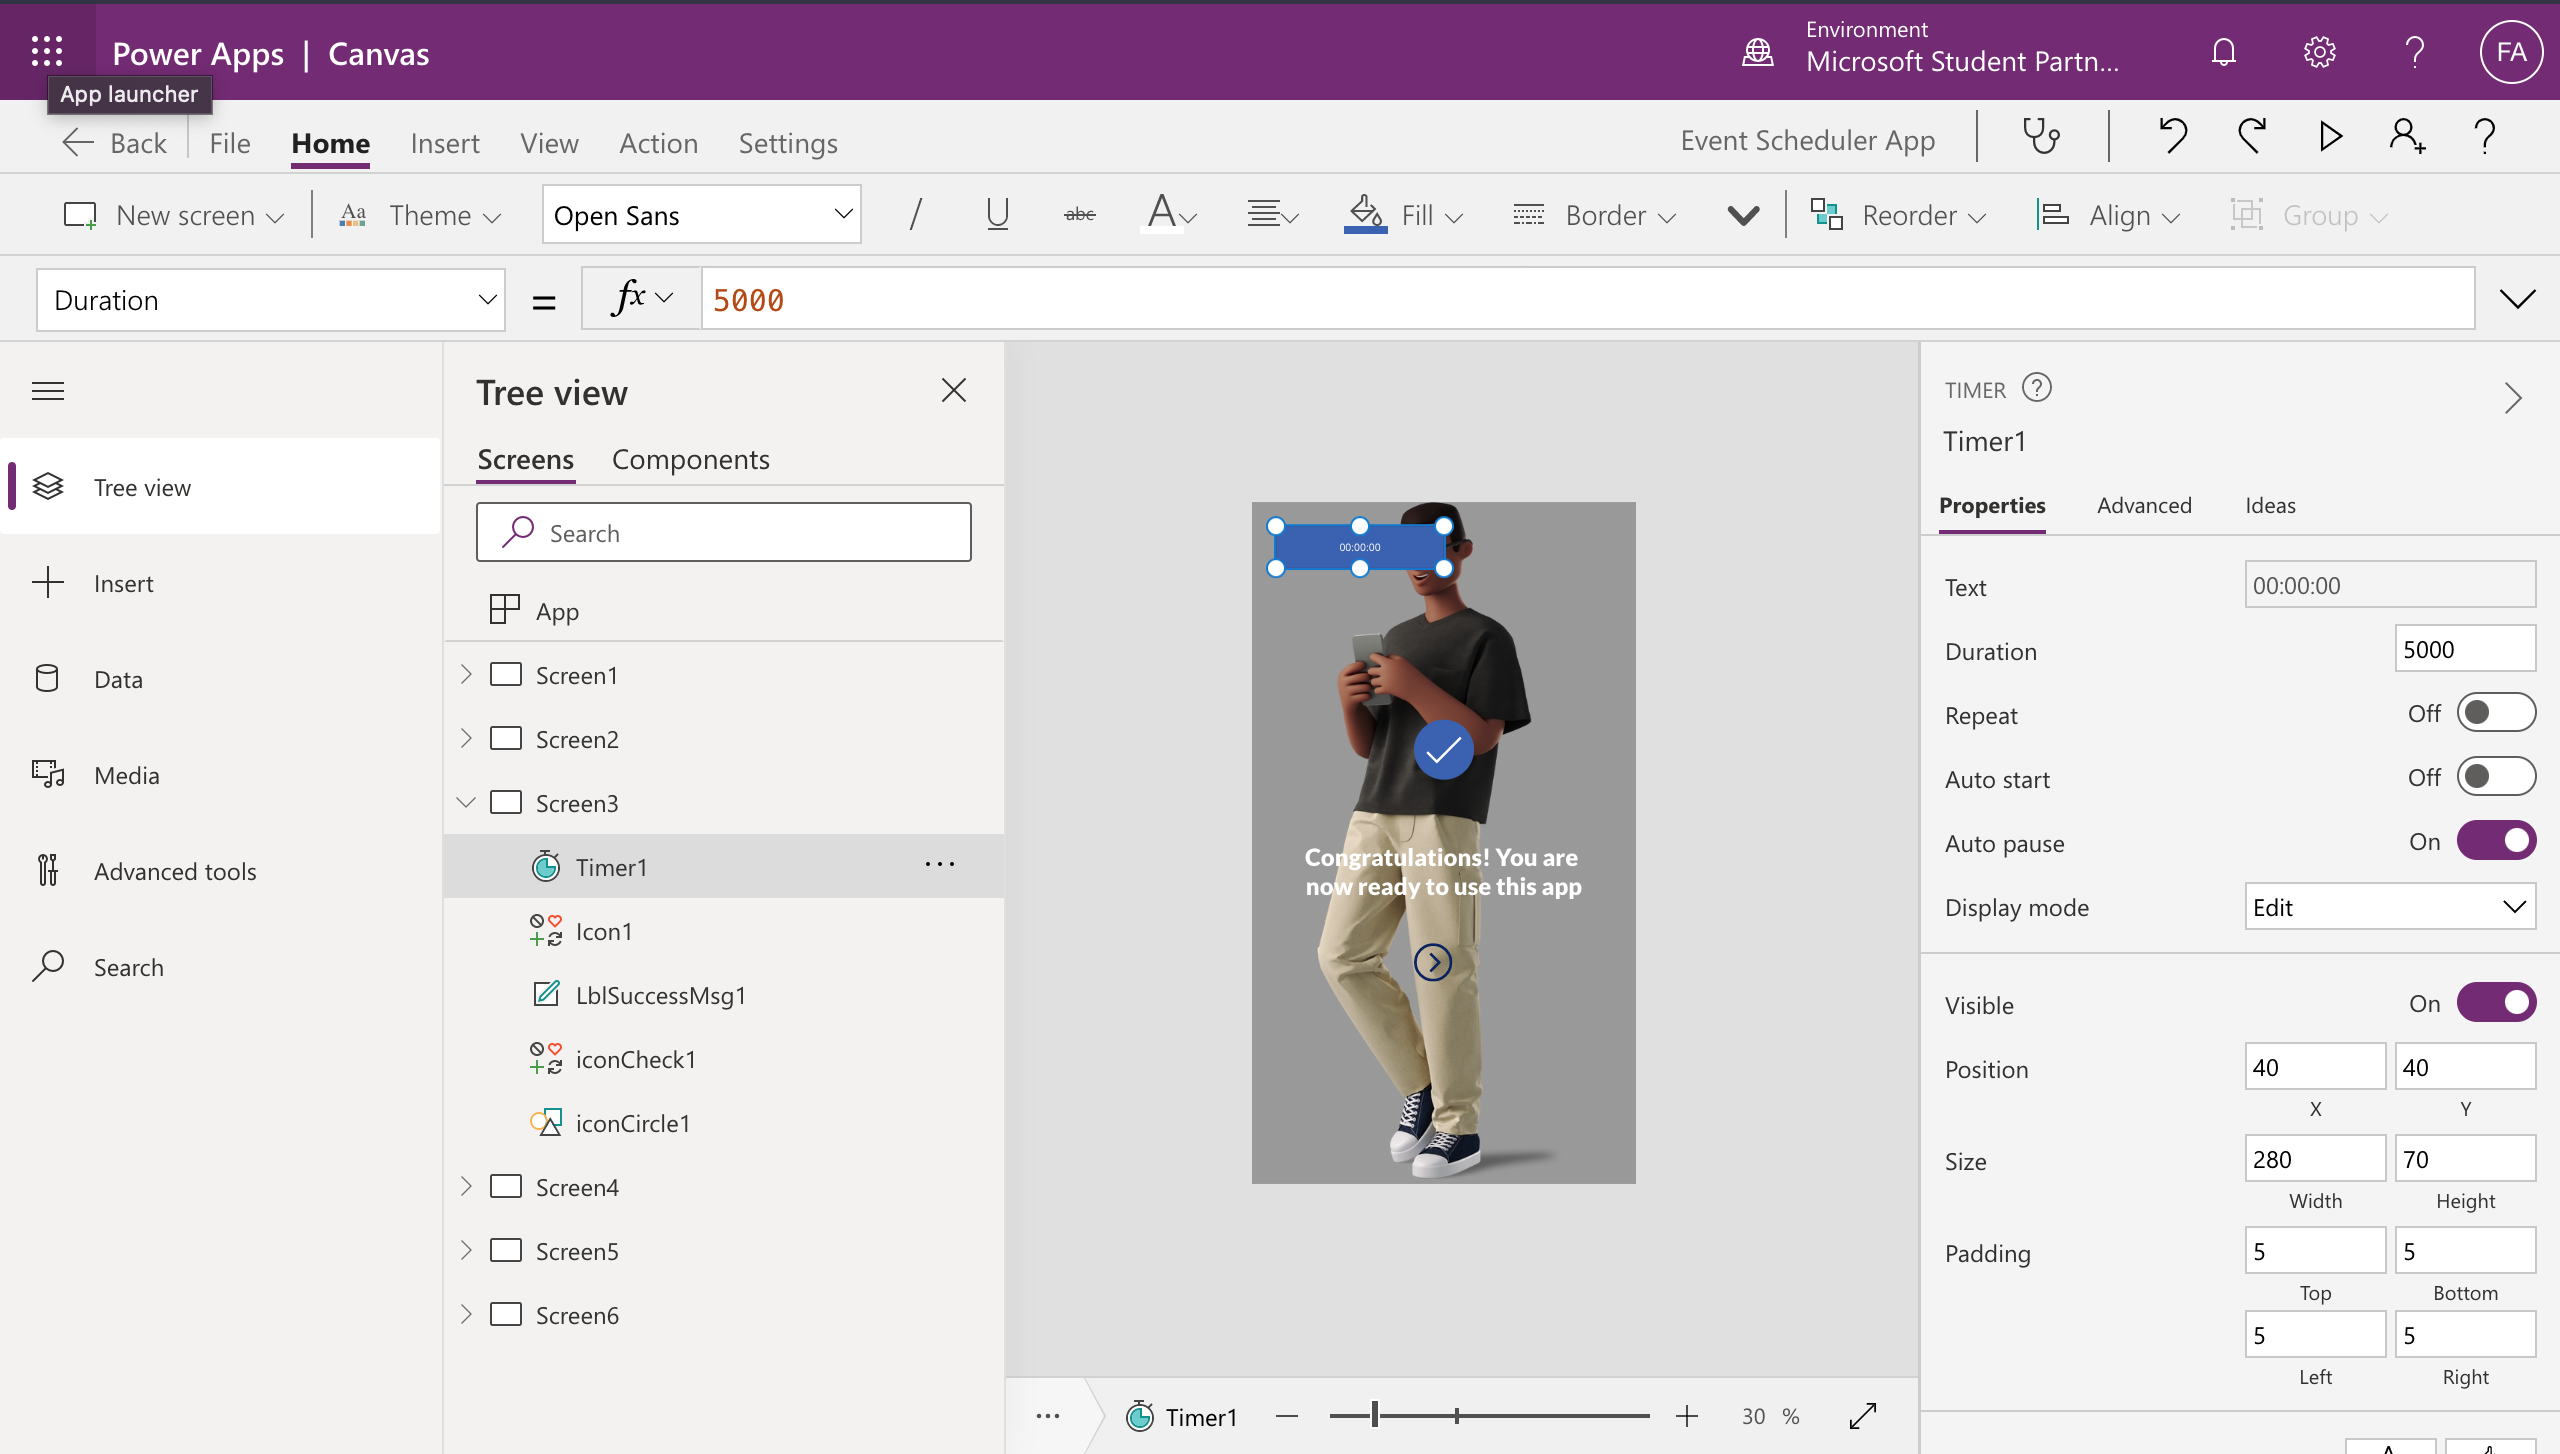
Now, we need to set a few parameters for the Timer Component:
Firstly, is the duration.
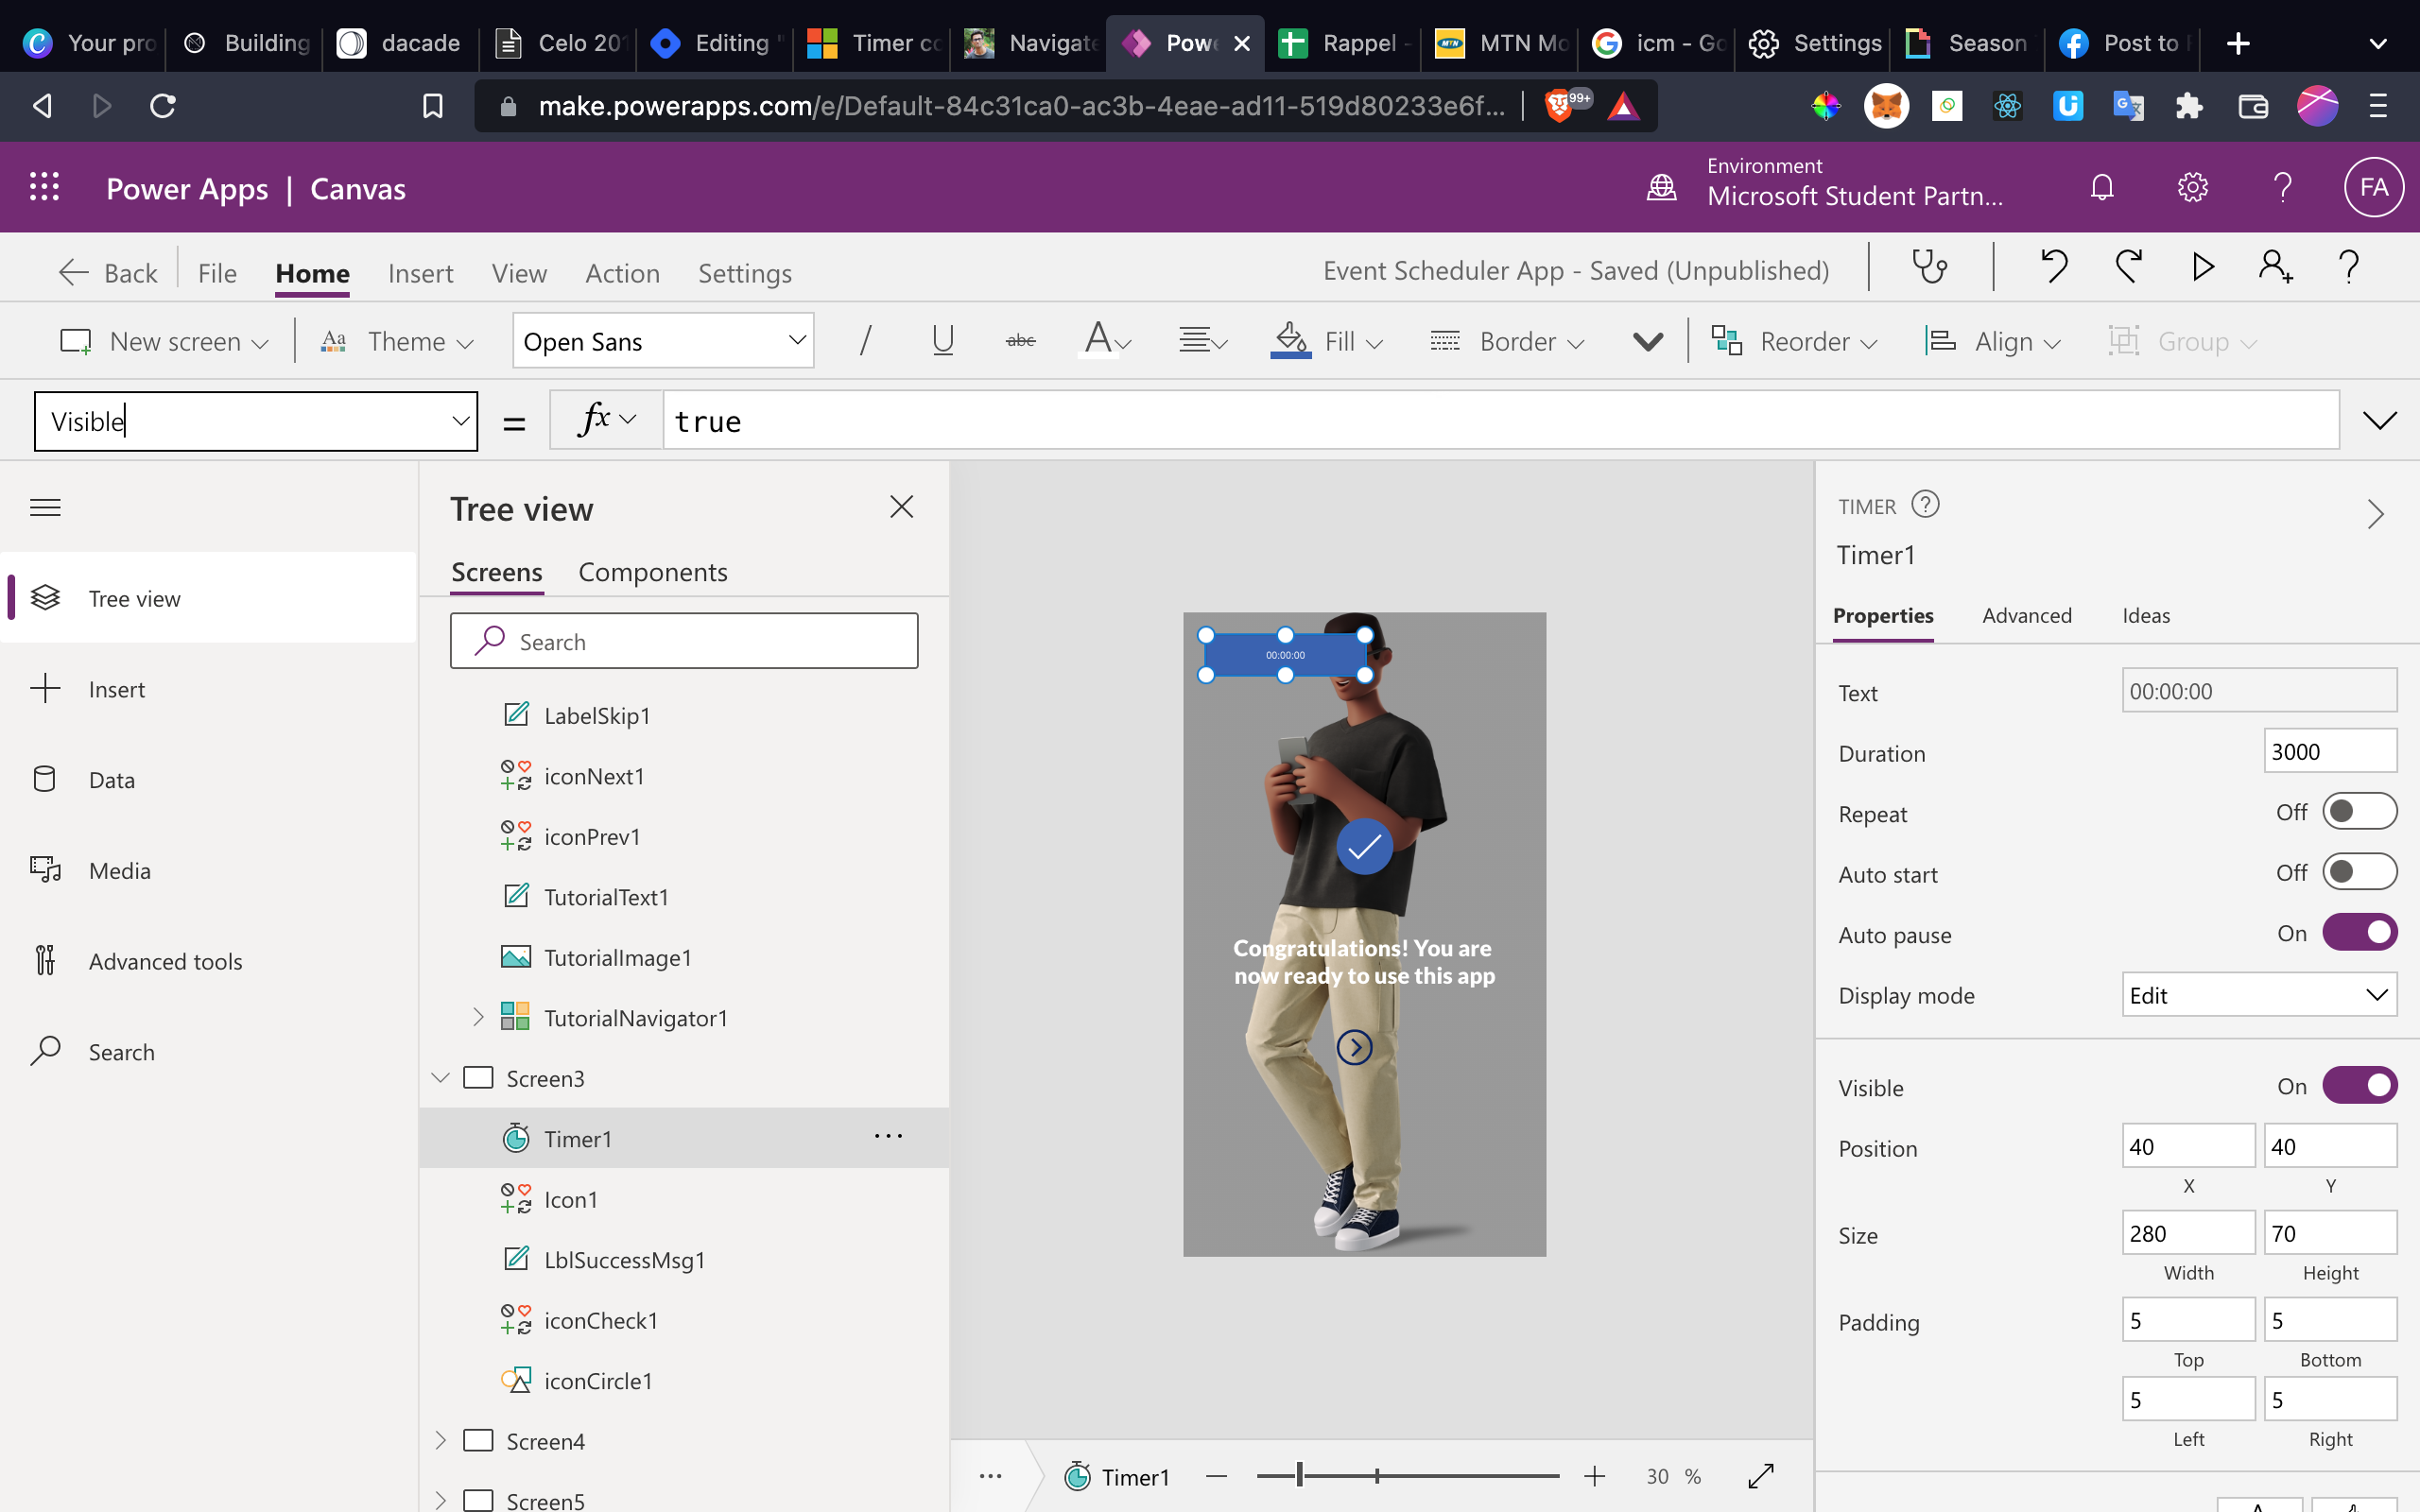
You can specify in milliseconds here. Example: 3000 i.e. 3 seconds
Next, you’ll need to set the Start flag. By default, this is set to false. The Start is triggered when the value is set to True. This needs to be dynamically set from elsewhere i.e. in this example, you’ll need to trigger from where you come to this screen so that the Timer starts the countdown.

Now, the way I set this is, first I create a variable from the place where I want to trigger the Timer to go off, that is my previous Screen (Screen2). I’m creating and setting a variable called startTimer and setting the value to true:
You will then return to your Timer Component in Screen3 and set this variable startTimer to the Start property.
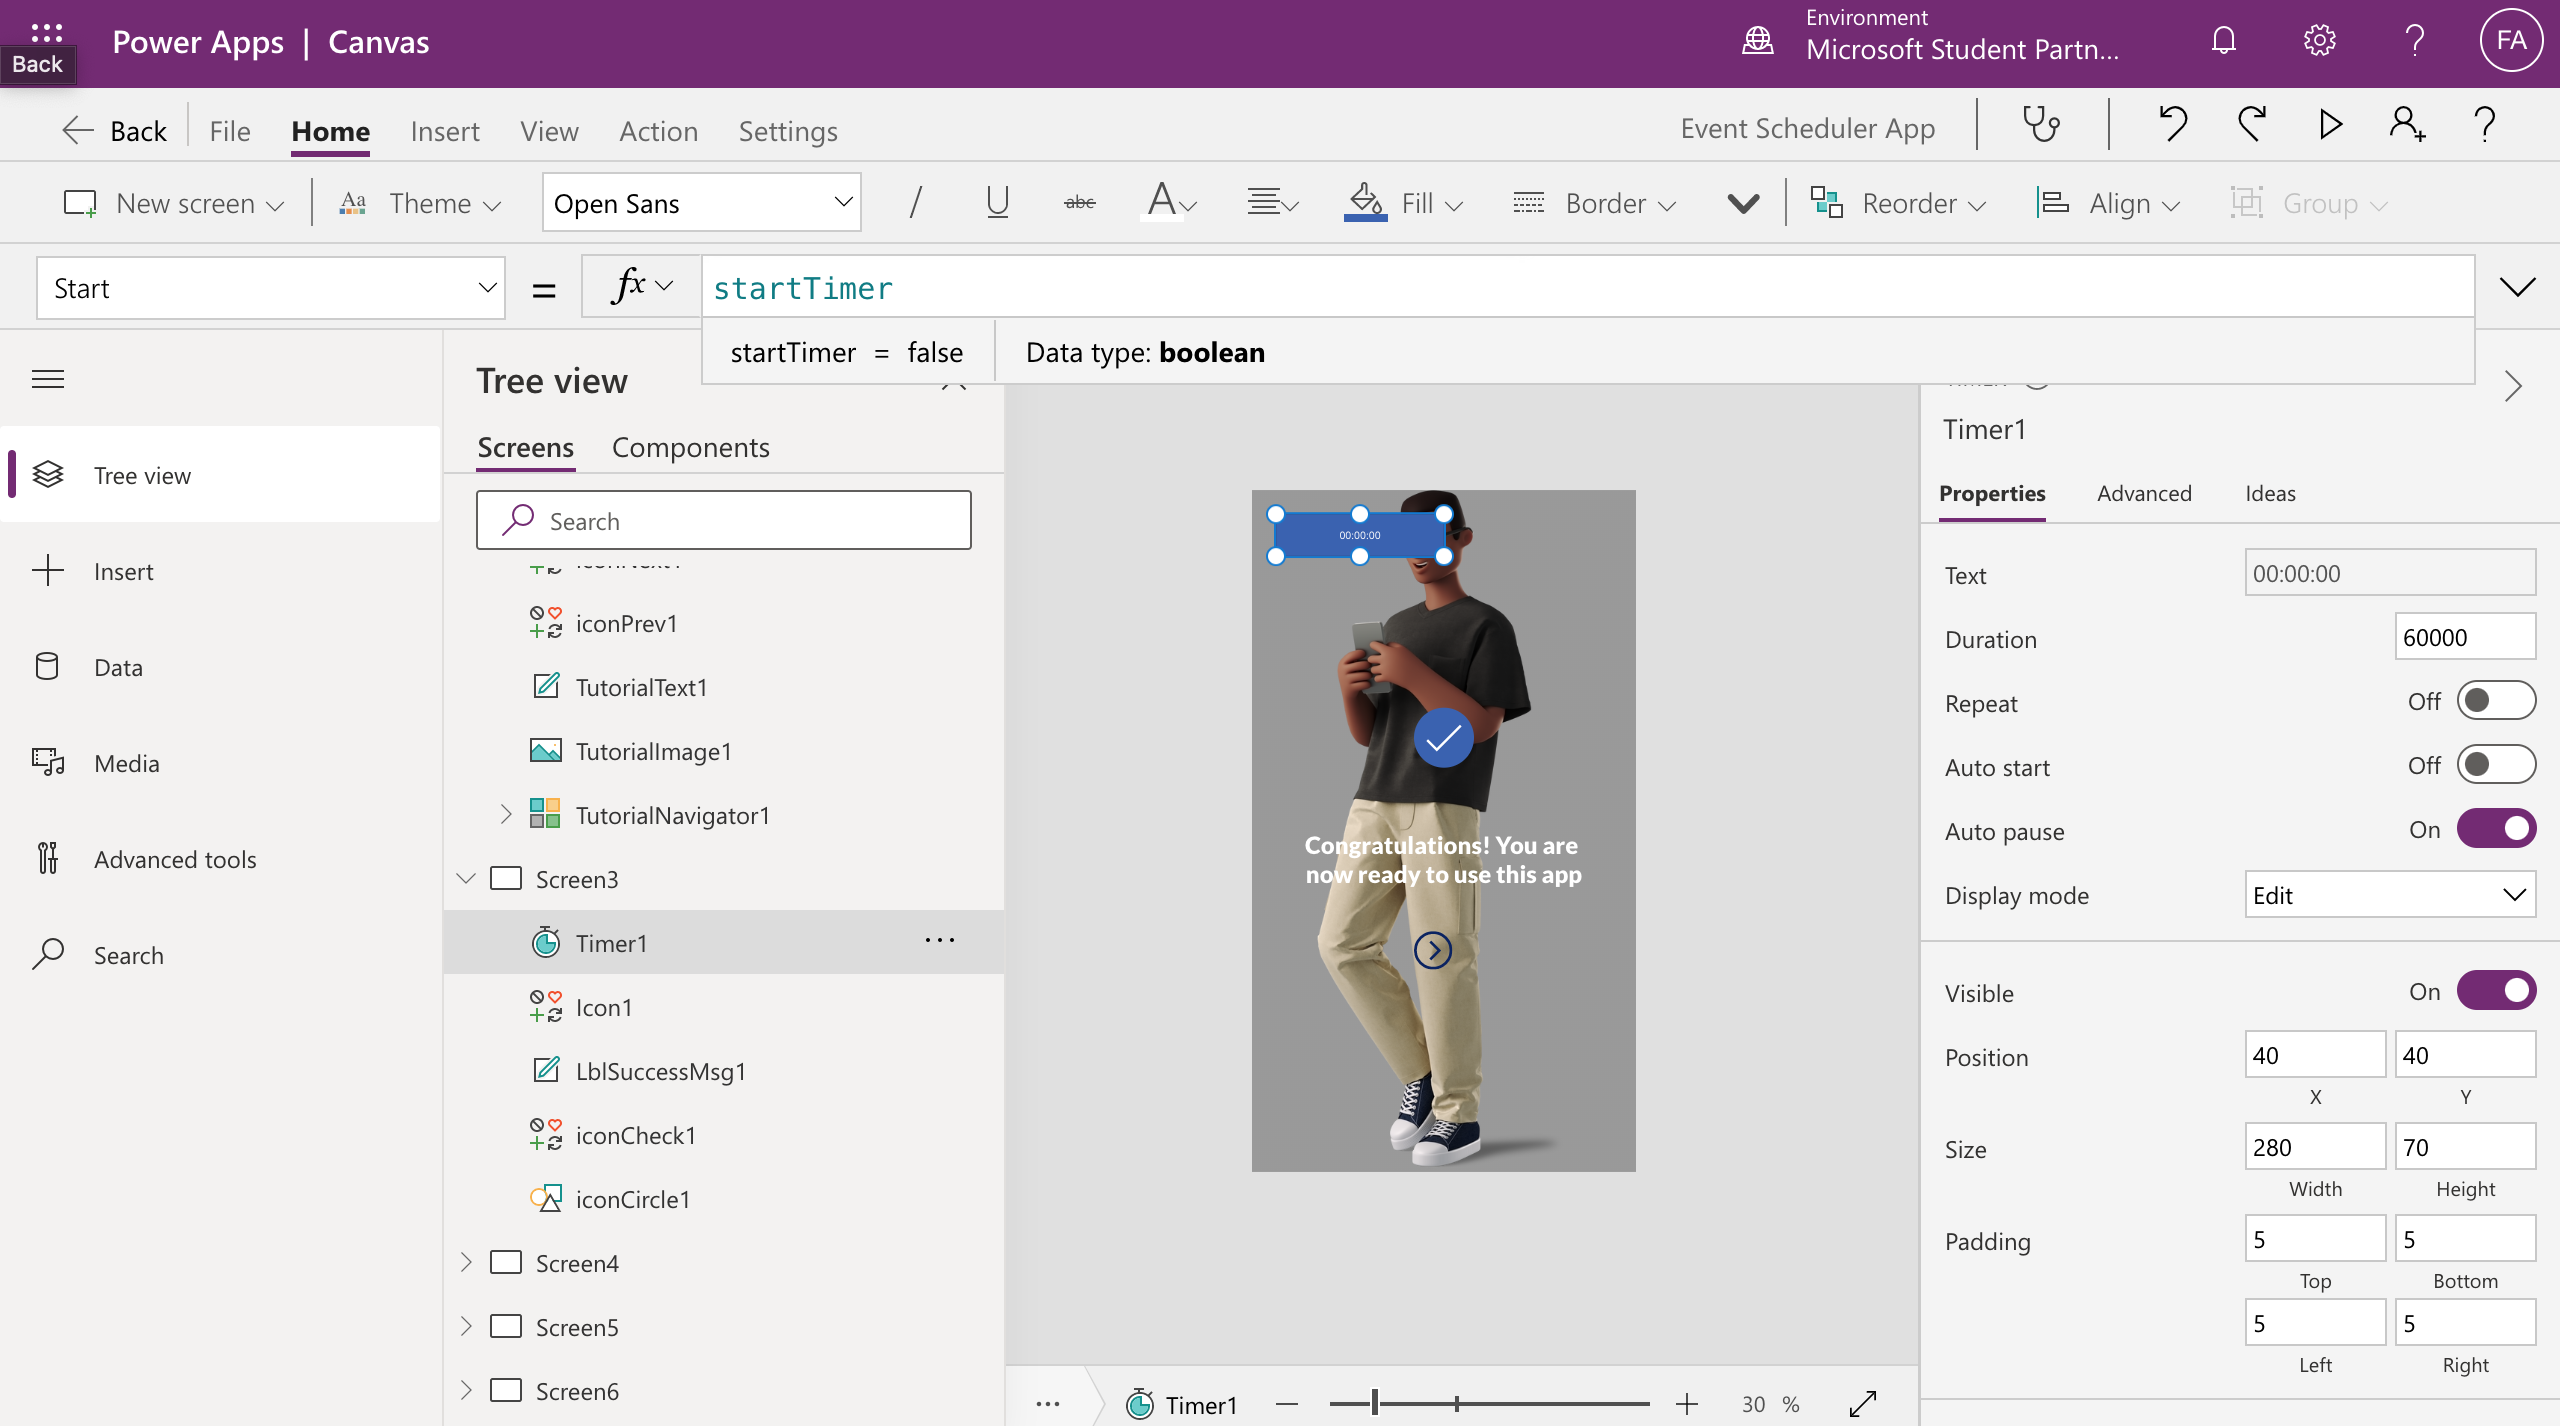
Also, you’ll need to set what needs to happen when the Timer ends. So, you have to write the OnTimerEnd property as to what will happen once the Timer ends. Here, you’ll Navigate to the 'Screen4’ as per our scenario and then also, set the startTimer flag to ‘false’ since you want to reuse this again for the next submission.
Now this works fine as Screen 4 loads immediately after the duration of the timer is elapsed.
Finally, I will hide the timer component from showing on the screen. To do this I will set the visible property to false. It is set to true by default, and by doing this immediately our timer becomes not visible but still works properly.
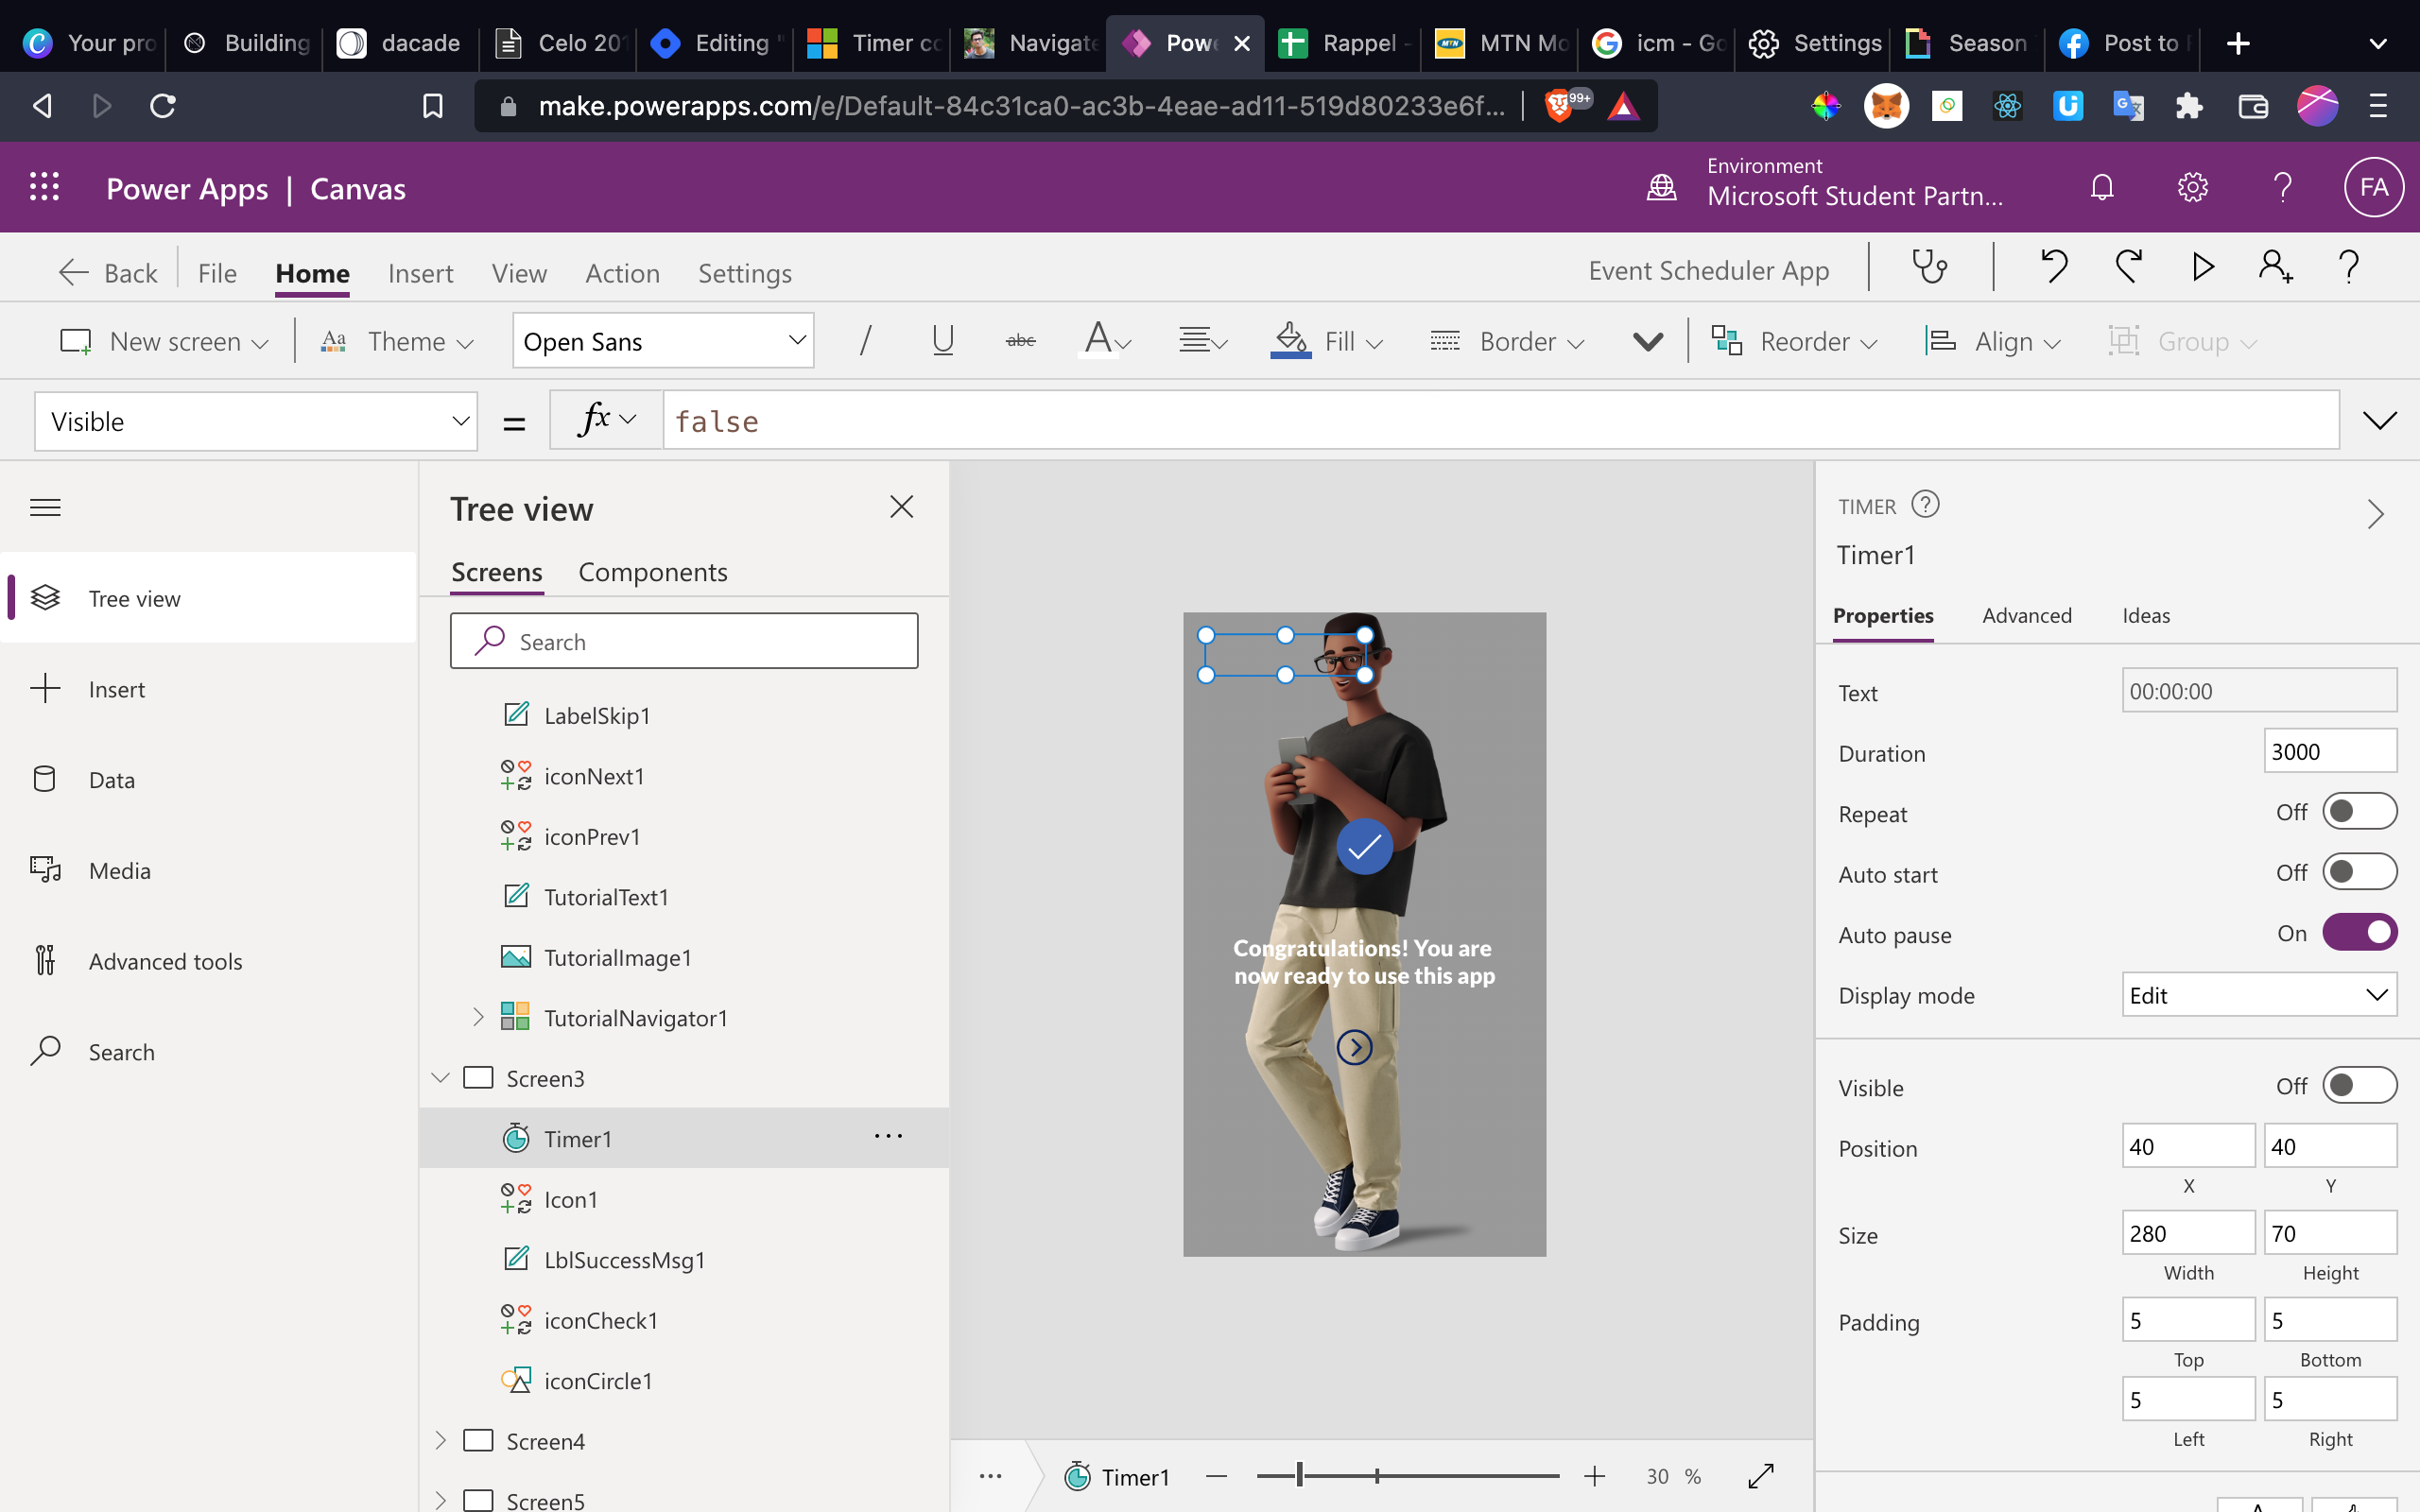
In conclusion, with this new feature added to our app, we can now remove the previous buttons added to navigate to Screen4 from the Success Screen (Screen3), and this is the new look for Screen 3
Now we have improved our app by using the Timer control component to our app.
As said earlier to fully understand everything discussed up till this point, kindly read and understand the previous article on Using Data Connectors with Microsoft Power Apps
Finally, I will be ending this article, with helpful resources to aid you learning